Bigpond is one of the largest Internet Service provider in Australia. Lately, it has started providing its services using the name “Telstra Media.” Bigpond mail is one of the best email service providers regarding speed and multiple uses. You can set up to 15 additional email address of any domain in your account. It helps you manage your various accounts and services that will help you save your valuable time. You must be the customer of Telstra Media to be able to access Bigpond email services.
If you are using any service of Telstra Media, then you can contact Telstra account team (1800-431-401) and then ask them to set up your email address with the domain @bigpond.com. After that, you can access email address either through your mobile or the web browser.
Table of Contents
Bigpond webmail login from PC/Laptop
- Go to Bigpond login page on https://signon.bigpond.com.
- Enter the email address of Bigpond or Telstra.
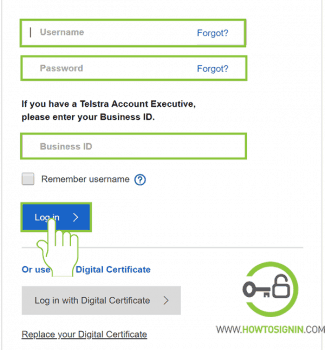
- Insert the password linked with the email address that you have entered.
- If you want your device to remember you so that you don’t have to enter the username and password every time you log in, then click on “Remember username.”
- Click on “Log in” and you will be all set using webmail of Bigpond.
Bigpond webmail login from a mobile device
You can sign in to your account via an iOS device.
Bigpond email login from Android
- Go to the menu of your smartphone and then tap on settings (Gear icon).
- Swipe down and tap on ‘Accounts,’ it may be under a different section on different devices.
- At the bottom of the page tap on “Add Account”.
- In the list of all the accounts in the device tap on “Email.”
- Enter the Bigpond email address that you want to set up on your device and then tap on “Next.”
- Provide the password associated with the email address and tap on “Next.”
- Sync settings page will appear. Select the schedule to sync your email.
Your account must have been set up. If there arise any problem in the automatic setup process, then try using Manual setup. To set up Bigpond mail manually repeat the steps from 1 to 6 as above and tap on “Manual Setup.” After this follow these steps:
- In the account type, select “IMAP Account.”
- Enter your email address, username, and password in the respective field. If you don’t have a specific username, then type the email address in the field provided for username as well.
- In the IMAP server type imap.telstra.com
- elect “SSL” in security type and 993 in the port and then tap on “Next.”
- Type smtp.telstra.com as your SMTP server.
- Select “SSL” as security type and “465” as your SMTP port.
- Mark “Require sign in” and then tap on “Next.”
- Select the schedule to sync your email and mark “Notify me when email arrives” thereafter tap on “Next”.
- Type the account name for your email account and then tap on “Done.”
Bigpond webmail sign in from iPhone/iPad
- Go the settings on your IOS device.
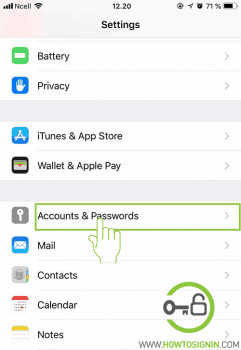
- Scroll down your settings menu and tap on “Mail, Contacts, Calendars.”
- Tap on “Add Account” at the top of the page.
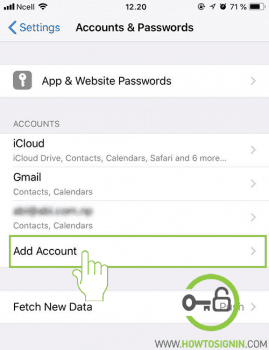
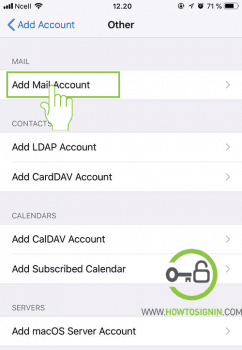
- You will be displayed the list of the accounts on your device. Tap on “Other” at the bottom of the page.
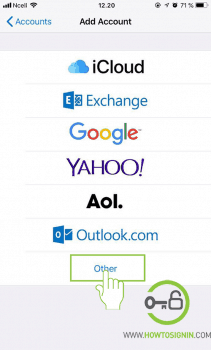
- Under the Mail tab tap on “Add Mail Account.”
- Enter your name for the account and password. If you wish, you can update description as well.
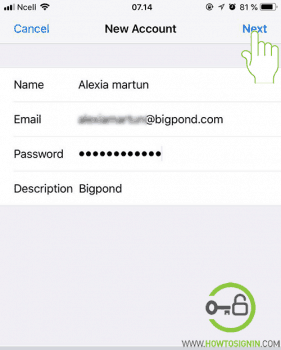
You are all done setting up Bigpond mail on your IOS device.