You need to sign up for an Apple ID to access the services of Apple, like App Store, iCloud, Apple Music, Podcasts, etc. Besides this Apple ID in necessary to purchase apps from Apple Store and download contents from iTunes Store. Already have an account? Go to Apple ID login.
Apple ID sign up using iPhone, iPad
This is a simple and easy Apple ID registration process. You can create an Apple account from the iOS device, Mac, and web-browser.
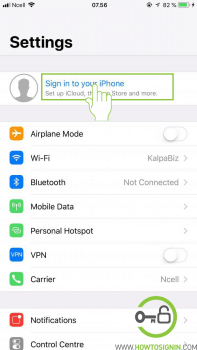
- Launch settings by tapping the gear icon on your iPhone.
- Tap on “Sign in to your iPhone” that lies to the top of the settings of the page in case there your iPhone has not been logged in with Apple id.
- You will reach the place to enter your login id and password. Tap on “Don’t have an Apple ID or forgot it?” option.
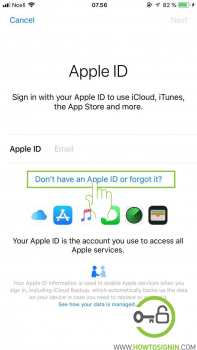
- Select “Create an Apple ID”.
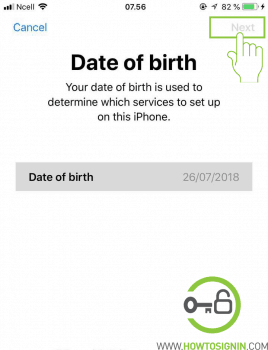
- Now enter your birth date. Your age will be used to customize the services and recommendations made to you so enter your actual birthday and then tap on “Next” at the top right corner of the screen.
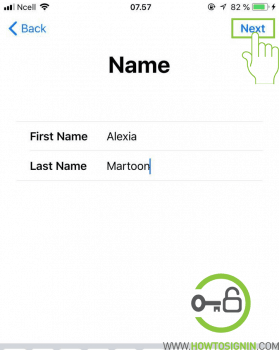
- Enter your first name and last name in the respective field and then tap on “Next” at the top right corner of the screen.
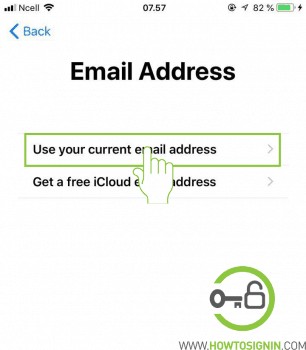
- If you want to use your existing email as Apple ID, then select “Use your current email address” and if you want to create new iCloud email then tap on “Get a free iCloud email address”.
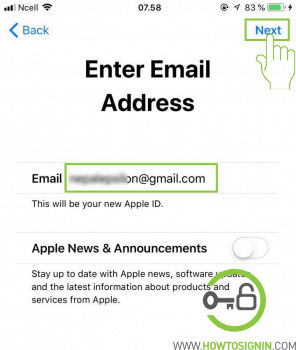
- Enter the email address that you want to use as Apple ID and then tap on “Next”.
- Now create a password for your Apple ID. Your password should be at least of 8 characters with the combination of upper and lower-case alphabets, number and special characters.
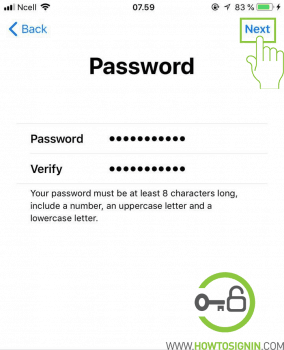
- Re-type the password to confirm it and then tap on Next.
- Tap the country bar and then select the country you are from the drop-down list that appears.
- Enter your phone number. This number will be verified by sending code or by a call; so, provide the phone number that you have access to.
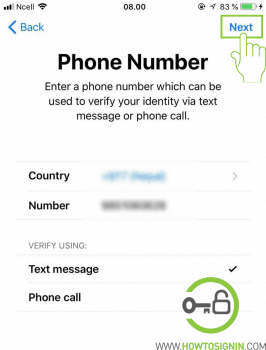
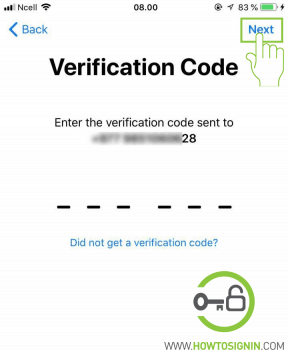
- Now a verification code will be sent to the mobile number that you have given. Enter the code and click Next.
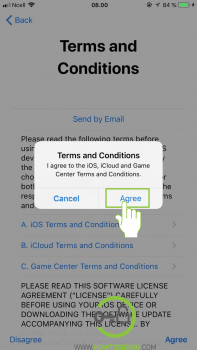
- The terms and conditions of Apple will be shown on the screen. Read them and tap on “Agree”. You can have the terms and condition sent to your email, just tap on “Send by Email”.
- Now verify your email address. Click on verify your email address to get the verification code.
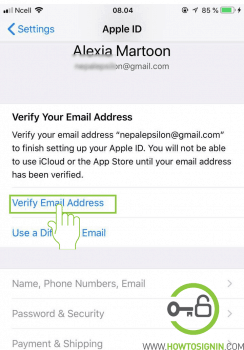
- Enter the verification code you received in your inbox.
Your Apple ID is now created. You should have been signed in to iCloud automatically. If it is not automatically signed tap on “Sign in” option and then enter the Apple ID and password associated with it. Tap on “Merge” if you want calendar, reminders, contacts etc. to be synchronized to your iCloud; otherwise, tap on “Cancel”.
Create Apple account from web-browser
You don’t need Apple product like Mac or iPhone to create an Apple ID. You can do it from any PC with internet connection in it. Just follow these steps:
- Visit Apple ID homepage from the browser.
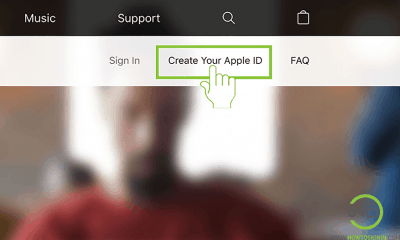
- Click on “Create your Apple ID” option that lies toward the top right corner of the page.
- Now you will be asked to enter your basic information as below:
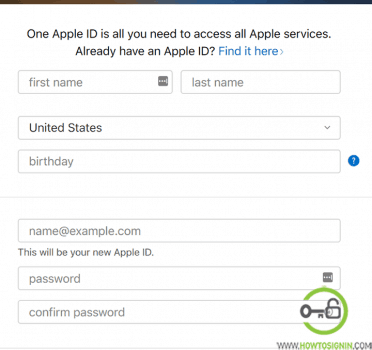
- Your Full name
- The country you are from
- Your date of birth. Enter your correct birth date as your date of birth will be used to verify your identity and customize certain services provided by Apple.
- Enter an email address that will be used to as your Apple id. You can use email of any domain whether that is Gmail, Outlook, Hotmail, or any other. But you won’t be allowed to email id that has already been used as Apple id.
- Enter an email address that will be used to as your Apple id. You can use email of any domain whether that is Gmail, Outlook, Hotmail, or any other. But you won’t be allowed to email id that has already been used as Apple id.
- Enter an email address that will be used to as your Apple id. You can use email of any domain whether that is Gmail, Outlook, Hotmail, or any other. But you won’t be allowed to email id that has already been used as Apple id.
- Enter your desired password for your new apple id. Make sure you enter a strong password for the safety of your account.
- Re-enter your password.
- As you are done entering all the information select the 3 security questions from the drop-down list that appears as you click downward facing arrow and provide answers to them in the respective field. The answer should be difficult for others to guess and easy for you to remember.
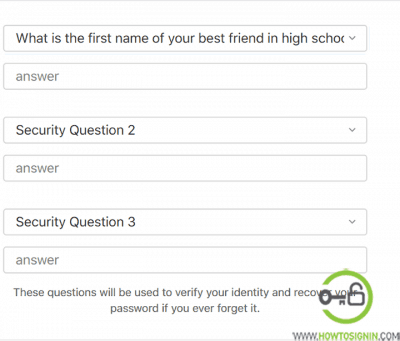
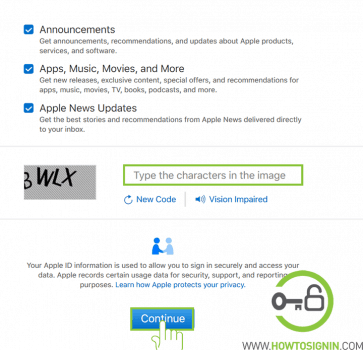
- If you don’t want announcement mail, news and updates from Apple then uncheck the boxes; otherwise, leave it as it is.
- Enter the security code displayed in the grey box at the bottom of the page. If you could not identify the code click on “New Code” and then click on “Continue”.
- Now a verification code will be sent to the email address you have provided. Open the email and then enter the code in the provided field in Apple’s website. Apple id though created will not be accessible until you verify the email ID first.
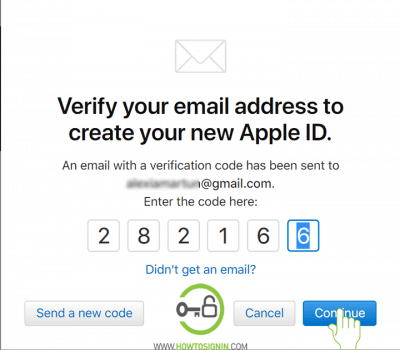
- Finally, click on continue and the account will be created.
Apple id is all set to be used. It can now be used in all the Apple devices and all the functions provided by Apple Inc can be enjoyed.
